Side Dishes


Simple Sides: Refreshing Melon Citrus Salad

This week’s simple side is brought to us by Anne of  Quick and Easy Cheap and Healthy.  As the title implies, Anne regularly shares healthy recipes that don’t require tons of time or money.  Anne has a child with food allergies.  While Quick and Easy Cheap and Healthy is not completely allergen-free, most of them are easily adapted.  I should mention that Anne has a second blog When Food is Dangerous that is top 8 free.

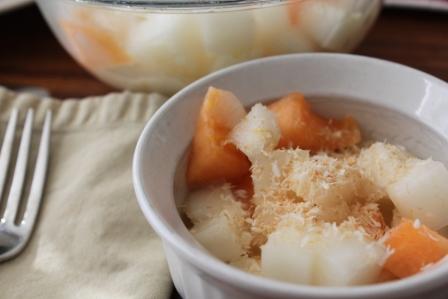
Today at Quick and Easy Cheap and Healthy, Anne shares this Refreshing Melon Citrus Salad.   I love how she takes a humble fruit salad to a new level with coconut milk and toasted coconut.  Here’s what she writes:

I often just chop up whatever fruit is in the fridge into a take-it-or-leave-it conglomeration, but I also like to come up with intentional creations that take into consideration flavors, textures and colors. There are a few such standbys that serve me well, but now and then the urge strikes to try something new and perk up the taste buds with some additional, unexpected flavor.

This was the position I found myself in a couple weeks ago, when I had a strange new melon I had bought at the Farmer’s Market…

You can read the rest of the story and find the recipe for this Refreshing Melon Citrus Salad here.

I hope you are enjoying this simple sides series as much as I am.  In case you missed it, last week Steph at The Cheapskate Cook shared a beautiful Tomato and Basil Bruschetta recipe.  I can’t wait to see what Mary at Barefeet in the Kitchen comes up with next week.  Then it’s my turn!

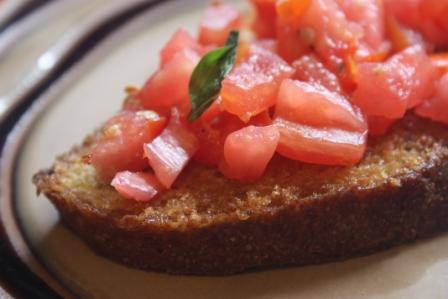
Simple Sides: Tomato & Basil Bruschetta

I am thrilled to announce a new series called Simple Sides.  Every Thursday during the  month of August, some blogger friends and I will be sharing a few of our favorite summer side dishes.

Up first is Steph at The Cheapskate Cook .  Steph’s blog focuses on real food on a budget.  Make sure you read this inspiring series on how she and her husband survived spending only $25/week on whole foods.

This week she is sharing this beautiful Tomato and Basil Bruschetta recipe. 

What a wonderful idea for the tomato bounty in our garden!  Here’s what she says about the recipe:

While our culture tends to equate easy meals as something that comes from a box or is popped in the microwave, I’ve found it isn’t always practical. When you’re trying to eat healthy and super frugally, routinely making up meals based on convenience food literally doesn’t fit the bill…

So true Steph!  These are the other ladies that will be joining in on the fun:

I can’t wait to see what they come up with!


Honey Lemon Refrigerator Pickles (Bread and Butter Style)

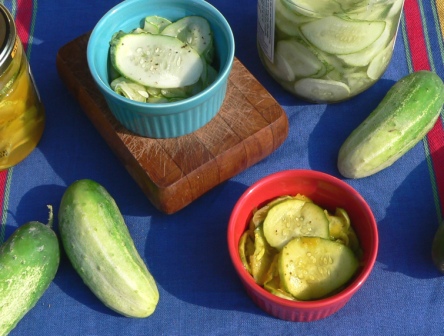
Yesterday I confessed my new obsession with cucumbers and shared a healthy version of refrigerator pickles using apple cider vinegar and honey.  You can find that recipe here.  I also shared that I found another refrigerator pickle recipe that was so unique I just had to try it. 

Instead of the traditional vinegar and sugar, the base of this recipe is lemon juice and honey.  Then you add a variety of spices including turmeric and cloves. 

I am no pickle connoisseur, but I would say that these pickles resemble bread and butter pickles with an interesting kick from the clove.  I did a quick search for bread and butter pickle recipes and found that turmeric is pretty standard, cloves appear occasionally and lemon and honey are rare.

I served both pickle recipes to an expert my pregnant sister in law.  She had not had refrigerator pickles before today.  She enjoyed the Honey Sweetened Pickles and could not taste the honey.  When she tried the Honey Lemon Pickles she agreed that they tasted similar to bread and butter pickles with a kick.  She could not identify the kick as cloves.

I have to admit, I don’t like to eat these pickles straight from the jar.  Maybe this is because I don’t really like bread and butter pickles.  But I added them to my hamburger last night and my turkey sandwich today.  I really, really liked what they added to my sandwiches.

Give ’em a try and let me know what you think!

Honey Lemon Refrigerator Pickles

This makes 3 pints so I halved the recipe.

Ingredients:

  • 6 cups Cucumbers, sliced
  • 2 cups Onions, sliced
  • 3/4 cup Honey
  • 1 cup Lemon Juice
  • 1/2 tsp Kelp Powder (Don’t have kelp?  You could try 1/4 tsp salt.)
  • 1/2 tsp Mustard Seed
  • 1/2 tsp Celery Seed
  • 1/2 tsp Ground Turmeric
  • 1/2 tsp Ground Cloves

Directions:

  1. Put cucumbers and onions in a large glass bowl.  Add remaining ingredients to a saucepan.  Bring to a boil and cook and stir until honey is dissolved.
  2. Pour the liquid over the vegetables and stir well.  Let the cucumbers cool while keeping them submerged.
  3. Transfer pickles to jars and refrigerate at least 24 hours.
  4. Store in refrigerator.

This recipe came from From Asparagus to Zucchini.


Honey Sweetened Refrigerator Pickles

I have had issues with cucumbers recently.  It’s strange because I used to dislike them but lately I can’t get enough.  My body must be deficient in cucumber vitamins.  🙂  When I saw a box of organic cucumbers for sale at the farmer’s market I grabbed it.  Don’t worry, I paid for it first.

What’s a girl to do with a box of cucumbers but make pickles.  All of the refrigerator pickle recipes I had called for white sugar.  I haven’t had white sugar in the kitchen for some time.  I wondered, could I use sucanat?  I didn’t think that would work since it has a maple like flavor.  I was also afraid it would make the pickle juice an unappetizing brown color.

Then I wondered if I could use honey.  I did some searching online and found two recipes.  The first one seemed to be a simple and classic refrigerator pickle recipe with a few healthy adaptations.  The second recipe was like nothing I had seen before.  Pickles in lemon juice instead of vinegar.  Cloves, really?

I couldn’t help myself.  I tried them both. 

This honey sweetened refrigerator pickle recipe is a great basic recipe with the traditional taste you expect from refridgerator pickles.  There is a nice balance of salty, sweet and sour.  Next time I make them I might throw in some garlic or dill for fun.

Honey Sweetened Refrigerator Pickles

Ingredients:

  • 3 Large Cucumbers, sliced thin
  • 1 Medium Onion, sliced thin
  • 2 tsp Sea Salt
  • 1 tsp Celery Seed
  • 1/4 to 1/2 cup Honey
  • 1/2 cup Apple Cider Vinegar

Directions:

  1. Gently mix cucumbers, onion, salt and celery seed in a large bowl.
  2. Let stand at room temperature for 1 hour.  (I may or may not have eaten half the bowl of salted cukes before the hour was up.)
  3. Stir honey and vinegar in a small bowl until honey is dissolved.  Pour over cucumber mixture.
  4. Mix well.  Cover and refrigerate 24 hours.
  5. Pickles will keep 3 weeks or more in the refrigerator.

And the second recipe?  You can find it here.

This post is part of Melt in Your Mouth Mondays, Mouthwatering Monday, Monday Mania, Mangia Monday, Make a Food”e” Friend, Mingle Monday,  Weekend Gourmet Blog CarnivalThis Weeks Cravings, My Meatless Mondays, Just Another Meatless MondayHearth and Soul Hop, Made From Scratch Tuesday,  Tempt My Tummy Tuesday, Tuesday Night Supper Club, Delectable Tuesday, Tuesdays at the Table, $5 Dinner Challenge, Tip Me Tuesday, Tasty Tuesdays , Totally Tasty Tuesday, Tasty Tuesday Parade of Foods, Slightly Indulgent Tuesday, Domestically Divine, Tackle it Tuesday, {TITUS 2}SDAYS, Delicious Dishes, show me what ya got, Tuesday Time Out Link Up, Gratituesday, Tea Party Tuesday, Handmade Tuesday, What’s on the Menu, Made it on Monday, Whatcha Makin’ Wednesdays, Gluten Free Wednesdays, Real Food Wednesdays, What’s on Your Plate, What’s Cooking Wednesday, What We’re Eating Wednesday, Show and Tell,  Works for Me Wednesday, This Chick Cooks, Creative Juice, Foodie Wednesday, Healthy 2day, Inspired by You Wednesdays, Let’s Do Brunch, Cast Party Wednesday, Full Plate Thursday, Pennywise Platter Thursday,  Tip Day Thursday, Real Food Weekly, Simple Lives Thursday, It’s a Keeper Thursdays, Strut Your Stuff, Thrilling Thursday , Recipe Swap Thursday, Frugal Food Thursday, Hookin Up with HoH, Ultimate Recipe Swap, Food Trip Friday, Friday Potluck, Foodie Friday,  Friday Favorites, Fresh Bites Friday, Show and Tell Friday, Allergy Friendly Friday, I’m Lovin It Fridays!, Fun with Food Friday, Fight Back Friday, Fat Camp Friday, Foodie Friday, Fresh, Clean and Pure Friday, GCC Recipe Swap, Food on Friday, Finer Things FridayFriday Food Linky, Friday Flair, Weekend Wrap Up Party, Party Mindie Style, My Favorite Things Friday, Friday Food Fight, Sweet Tooth Friday, Wellness Weekend, Show and Tell Saturday, The Lady Bloggers Tea Party

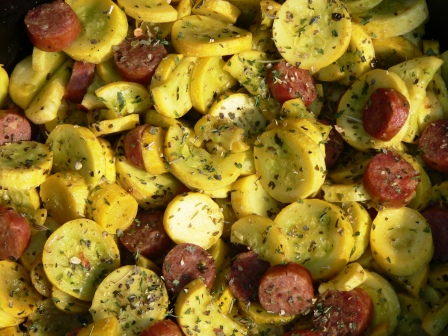
Italian Sausage and Summer Squash Skillet

Did I mention we eat a lot of squash in the summer?  Squash cooks so fast that it makes a wonderful, healthy lunch.  While squash alone can be pretty bland, this recipe is full of flavor.  Here’s how I fix my my favorite squash skillet.

Ingredients:

  • Palm Shortening or oil of choice
  • 1 Large Yellow Onion, chopped
  • 1/2 Pound Italian Sausage Links, sliced
  • 9-12 Small Summer Squash, sliced
  • Italian Seasoning
  • Salt and Pepper

Directions:

  1. Heat oil in skillet.  Cook onion and sausage until onion is clear and sausage is brown.
  2. Add squash and season liberally with Italian seasoning, salt and pepper.  Cook until squash is tender.

You may also enjoy Summer Squash and Chicken Skillet and Nancy’s Green Beans and Sausage.

This recipe is part of Melt in Your Mouth Mondays, Tip Me Tuesday, Monday Mania, Made By You Monday, Make a Food”e” Friend, Mingle Monday, Hunk of Meat Monday, So Sweet Sunday, Sugar Free Sunday,  Seasonal Sunday,  Nifty Thrifty Sunday, A Themed Bakers Sunday, Cookbook Sunday, Sundae Scoop, The Sunday Showcase, Savory Sunday, Potluck Sunday, Simply Delish. {TITUS 2}SDAYS, Tuesdays at the Table, Totally Tasty Tuesday, Delicious Dishes, Tuesday Time Out Link Up, show me what ya got, Tasty Tuesdays, Slightly Indulgent Tuesday, Tip Me Tuesday, What’s Cooking Wednesday, Gluten Free Wednesdays, Works for Me Wednesday, Real Food Wednesdays, This Chick Cooks, Made it on Monday, Creative Juice, Foodie Wednesday, Healthy 2day Wednesdays, Thrilling Thursday, It’s a Keeper Thursdays, Strut Your Stuff, Frugal Food Thursday, Hookin Up with HoH, Real Food Weekly, Simple Lives Thursday, Recipe Swap Thursday, Pennywise Platter Thursday, Food Trip Friday, Friday Potluck, Foodie Friday,  Friday Favorites, Fresh Bites Friday, Show and Tell Friday, Allergy Friendly Friday, I’m Lovin It Fridays!, Fun with Food Friday, Fight Back Friday, Fat Camp Friday, Foodie Friday, Fresh, Clean and Pure Friday, GCC Recipe Swap, Food on Friday, Finer Things Friday, Sweet Tooth Friday, Friday Food Linky, Friday Flair, Weekend Wrap Up Party, Party Mindie Style, Show and Tell Saturday, The Lady Bloggers Tea Party

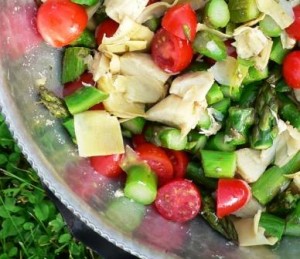
Roasted Asparagus and Artichoke Salad

When I saw this salad on Simply Recipes, I knew I had to make it.  I can’t resist artichoke and I love that asparagus is currently in season.  This salad is fresh.  It’s beautiful.  It’s quick and it’s allergen-friendly.

Ingredients

  • 1 large shallot, sliced thin (can sub a few thin slices of red onion or some sliced spring onion)
  • 2-3 Tbsp lemon juice
  • 2 pounds thick asparagus, rinsed, tough ends broken off and discarded (or saved for stock)
  • 2 Tbsp olive oil, divided
  • Salt
  • 1 teaspoon garlic powder
  • 1 pint grape or cherry tomatoes, sliced in half
  • 1 15-ounce jar of good quality marinated artichoke hearts, quartered or cut in half (depending on the size of the artichokes)

Method

1 Soak the sliced shallots in the lemon juice as you get ready to make the rest of the salad.
2a To roast the asparagus, preheat the oven to 400°F. Coat the asparagus spears with 1 Tbsp of olive oil, and salt them well. Lay in a single layer in a foil-lined roasting pan, and cook for 8-10 minutes until lightly browned and fork tender.
2b To grill the asparagus, prepare your charcoal or gas grill for high direct heat. Coat the asparagus with 1 Tbsp of olive oil and sprinkle with salt. Grill them until nicely charred and fork tender, between 5 to 10 minutes.
Remove the asparagus from the oven or grill and cut into bite-sized pieces.
3 Put the asparagus and all the remaining ingredients into a large bowl and mix to combine. Add as much of the marinating liquid from the jarred artichokes as you like.  Serve chilled or at room temperature.
Want more allergy-friendly recipes?  Be sure to sign-up for free e-mail updates or become a Facebook fan in the side bar.

This post is part of Melt in Your Mouth Monday, My Meatless Mondays, Mouthwatering MondayMonday Mania, Make a Food”e” Friend, Mingle Monday, Mangia Monday, Just Another Meatless Monday, Made By You Monday, $5 Dinner Challenge, Tuesdays at the Table, Tip Me Tuesday, Tuesday Night Supper Club, Hearth and Soul Hop, Tasty Tuesdays, Made From Scratch Tuesday,Slightly Indulgent Tuesday, Tasty Tuesdays, {TITUS 2}SDAYS, Works for Me Wednesday, Show and Tell, What’s Cooking Wednesday, Gluten Free Wednesdays, Whatcha Makin’ Wednesdays, What’s on the Menu, Real Food Wednesdays, Made it on Monday, What’s on Your Plate, Strut Your Stuff, Full Plate Thursday, It’s a Keeper Thursdays, Tip Day Thursday, Simple Lives Thursday, Frugal Food Thursday, Pennywise Platter Thursday, Thrilling Thursday, Food Trip Friday, Fight Back Friday, Friday Potluck, Foodie Friday, Show and Tell Friday, Fat Camp Friday, Foodie Friday, Fresh, Clean and Pure Friday, Friday Food, Nifty Thrifty Sunday, Sugar Free Sunday, Seasonal Sunday, Allergy Friendly Friday

Watermelon Fruit Basket


I love this beautiful watermelon fruit basket from Finding Joy in My Kitchen!  She set her basket out with some skewers and let guests make their own fruit kabobs.  I’m thinking serving the fruit straight from the basket would be just fine.

Nancy’s Green Beans and Sausage


This is the dish I get asked to bring to dinners the most.  Any type of sausage and green beans will work but my favorites are Polish Sausage and Italian Green Beans.  This makes a big pot full!

Nancy’s Green Beans and Sausage

Ingredients:

  • 1 pound Polish Sausage
  • 4 bags of frozen Italian Green Beans
  • 3 Tbsp dried Minced Onion
  • Garlic Powder
  • Salt and Pepper

Directions:

1. Slice the sausage into bite sized pieces

2. In a large pot, brown sausage over medium high heat.  This is the most important step.  You want to have lots of brown stuff stuck to the bottom of the pan.  The sausage should be almost burnt.

3.  While the pan is very hot add 1/2 – 1 cup of cold water.  Scrape all the stuff off the bottom of the pan.  It will lift off easily in the water.

4.  Stir in the green beans.  Sprinkle in the seasonings and mix well.

5.  Cover and cook on medium low until beans are tender.

You may also enjoy Italian Sausage and Summer Squash Skillet and Skillet Meal: Pizza Rice.

This post it part of Real Food Wednesdays, Whatcha Makin’ Wednesdays, Gluten Free Wednesdays, Pennywise Platter Thursday, Full Plate Thursday and Real Food Weekly.